Sunday, December 28, 2008

3 small tips on Sony PSP

Do you have and enjoy a PSP? Do you maintain it properly? These are not inexpensive devices, and you would not want them to burst accidentally, would you? Here are a few hints for keeping your PSP in superior working shape.

  • Maintain the entire parts clear of dust. Just like a PC, dust may harm PSP parts and including the screen. In one case, I left my PSP in a dirty place when I went on holiday. When I got back, there was a one inch fracture on the display.
  • Purchase a PSP case instead of a PSP sack. A case is strong and a pouch is cushy. This implies, if you by chance drop your PSP when it is in a case, it will endure the fall. Doing this actually ensures a longer lifetime for your PSP.
  • ONLY purchase a memory stick duo that possesses enough storage for what you require. For instance, it is no use purchasing a two GB Memory stick duo, if you just use the PSP from time to time, and you put like five songs and ten images on it. This will save you cash and not make you feel like you squandered money.

Altering the Save File pictures

* Anytime you save a game, one or two images are made on your memory stick: ICON#.PNG - the 144x80 image showed when you choose your saved file. The #, commonly 0, can be higher whenever a game puts more than one saves in single folder. PIC 1. PNG - the 480x272 background that is showed if you cursor over your save or game disk. Aware of this, you may custom-make your save images and backgrounds by merely substituting them with fresh . PNG files. Nevertheless, be sure that you retain the new file to a lesser degree or same to the master copy file's resolution, or the PSP will chop off sections to make it fit.

First link your PSP to your personal computer. Then find the save file you prefer to modify. Every save is placed in the PSPSAVEDATA folder, separated into different sub folders to retain required files collectively. When you have discovered the save icon you need to modify, put .ori to the end of the filename, just in case you ever prefer to modify it back to the previous condition. Resize the picture you want as you are save icon to 144x80 and then save it as a .PNG with the name ICON#.PNG - “where # was the number discovered on the file you renamed”. After that move the new image into your save folder.

Straight off, anytime you see your save files on the PSP, its image will be the picture you modified it to. Employ the similar technique to modify PIC 1.PNG files to your own custom images, but remember that the resolutions should be at most 480x272. *Do remember this is a little bit complex and could cause losing all saves if not executed correctly. This fine-tune is actually for those who know how to use these types of files.

How to Use Car Audio System to Play PSP Sounds Through FM wave

Utilise the following directions to have fun with your PSP games and films with your vehicle sound system. You'll require a FM modulator, a audio cable with a male stereo 1/8" earpiece connector at one end and divide right and left RCA connectors at the other. The red cable with the 'in' line fuse attached to your automobile battery or switch. The ground wire is grounded to the car frame. Adjust the vehicle's tape or CD set to the frequency modulation frequency that is on the modulator. The relative frequency is usually 88.7 or 89.1 MHz. Put in the RCA connectors by the audio cable into the RCA jacks located on modulator. put in the headphone end of the cable right into the PSP. Then, you can turn on the PSP with the volume set at half way.

The PSP's audio attached through your vehicle's transmitting aerial. No additional cables are required nor are another adaptations. Your games, song and films will now run through your vehicle's stereo loudspeaker system. Do remember: careful when attempting this and be sure you recognise how to apply the modulation unit and know the correct path to assemblage the cable to the fuze box and ground cable. If this isn't done correctly, this may harm or even fry the PSP.

Friday, December 12, 2008

AOL Instant Messenger in PSP


Even thought America Online is not likely to release a PSP Instant Messenger version of AOL soon, you don’t have to be without your buddy list. Using your PSP’s Web browser you can log on to WebAIM at www.webaim.net, type your username and password, and access your buddy list, send and receive instant messages, and more (see Figure for a look at WebAIM in action in a regular PC browser).WebAIM even has a login page made especially for PSPs, with an on-screen keyboard to save you time entering your username and password—just head over to http://dev.webaim.net/psplogin.jsp.

Figure shows WebAIM in action on my PSP using Sony’s Web browser, which is enabled in the Firmware 2.0 update. Of course, you can still use the Wipeout Pure Web browser, so you don’t have to upgrade to Firmware 2.0 and lose the ability to program your PSP and run homebrew applications.

WebAIM’s free servers are often pretty crowded, so getting one can take a while. I opted to pay for their premium service, which guarantees me access any time of the day, for around $4 per month or a scant $17 for six months.

Creating the Wipeout Directory


The Wipeout Web browser looks for documents to be stored in a folder called “wipeout,” so you need to create that folder. In your Web server’s documents folder, create a folder named wipeout. Create folder in the c:\inetpub\wwwroot, a folder that Microsoft’s IIS Web server generally uses. For MooPS you will simply place your files in c:\Program Files\MooPS\ROOT, where c:\Program Files\MooPS\ is where you installed MooPS—no wipeout directory is necessary.

Configure the DNS Server


You need to trick Wipeout Pure into loading your Web page instead of the one it expects. You do this by spoofing the location of the server that the game looks for. Once it finds your page, the sky’s the limit.
It’s probably not a good idea to make your DNS server publicly available. Not only may the traffic get unmanageable, but Sony’s legal team may call you telling you to cease and desist. If you leave this on your local network, or at least undisclosed to all the hack boards out there, you should be safe, but there are no guarantees if you open your hack up to the public.

If You’re Using Windows
Follow these steps:
1. Make sure MooPS is running.
2. Configure MooPS’ Server Settings menu

If you’re using a Web server other than MooPS, set the MooPS Port under Web Server to 33333 so it doesn’t conflict with your Web server.

If You’re Using BIND on Unix or Mac OS X
In the case of BIND, you will be creating a zone file to spoof Sony’s Web site,
ingame.scea.com. I will assume that if you have a BIND instance running, you already
know how to configure BIND, so we won’t go over it here. There are many fine books on setting up BIND, so hop onto Amazon.com or go to your local bookstore and you’ll find some excellent guides.
The zone file for BIND should have the following contents:
; scea.com zone file
$TTL 86400
@ IN SOA scea.com hacked.scea.com (
2005070942 ; serial number YYYYMMDDNN
28800 ; refresh interval
7200 ; retry interval
86400 ; expire timeout
86400 ; min. time to live (ttl)
)
; spoofed entries to point traffic to our local server instead of out on the Internet NS 192.168.2.1 ; says where the name server is (us, haha)
A 192.168.2.1 ; points the root to this IP address Ingame A 192.168.2.1 ; resolves ingame.scea.com to our local server Webcluster A 92.168.2.1 ; resolved webcluster.scea.com to our local server
Next you need to update your named.conf file and add the scea.com zone, as shown in the following code. Enter the text at the end of the file’s contents and then save the file. Like the zone file, be sure to use the tab key, not multiple spaces, when adding the entry.

zone “scea.com” {
type master;
file “scea.zone”;
};

Configuring DNS If You’re Using Mac OS X’s Built-In Web Server


Follow these steps:

  1. Open System Preferences from the Apple menu.
  2. Select Sharing.
  3. Under Personal Web Server, click the On check box and then click Start.
  4. Close the System Preferences window.
Your Web site documents are not stored under your home directory. Your Web site documents go into a global Web document folder. To access this directory in Finder, select Computer from the Go menu, then open the Library folder, then the WebServer folder, and then the Documents folder. In the terminal, you can also type cd /Library/WebServer/ Documents. This location may be different depending on the version of Mac OS X you are running. If the directory isn’t right for your version, load Help and search for Personal Web Sharing.

Friday, November 28, 2008

Configuring DNS If You’re Already Using Microsoft’s IIS to Host Your Own Web Site

Follow these steps:

  1. Follow the instructions for MooPS, but in the Server Settings window set the server port number to 33333 so it doesn’t conflict with IIS, which runs on port 80 (the standard port for Web and HTTP traffic).
  2. Open the Control Panel and then click Administrative Tools.
  3. Select Internet Information Services. This opens the Internet Information Services MMC (Microsoft Management Console) plug-in.
  4. Click the plus sign next to the computer icon, then click the plus sign next to Web Sites, and you’ll see Default Web Site.
  5. Right-click Default Web Site and select Properties.
  6. Under the Web Site tab, make sure IP Address is set to All Unassigned and that TCP Port is set to 80.
  7. Click the Documents tab and make sure Default.htm is in the list of documents
  8. Click the Home Directory tab and make a note of where your Web site’s documents are stored. You can change the directory, too, but the default location of c:\inetpub\wwwroot is usually just fine.
  9. All right, you’re good to go with IIS. In the next section, you configure the DNS server.

Configuring DNS If You’re Using MooPS


Follow these steps:

  1. Select Launch MooPS from the Start>All Programs>MooPS menu. After a few moments, the MooPS status window appears.
  2. From the Options menu, select Server Settings.
  3. When the MooPS – Server Settings window appears, enter the following:
  • Your computer’s IP address into the Redirect IP Address field.
  • Change the drop-down selection under IP Address from (Any) to your computer’s IP address
  • Your router’s IP address (the gateway address) into the IP Address field under DNS Client
  • Change the IP address under Web Server from (Any) to your computer’s IP address Click OK when you are done. If you don’t change the IP addresses in the drop-down lists that say (Any), MooPS will likely crash when you attempt to use it. If you don’t know your IP address and router address settings.Now that your server is configured you need to start it. From the Server menu, select Start. MooPS should then start its services and tell you everything’s okay.

Download the DNS Server


Now that we have the Web service part out of the way, let’s get the DNS server squared away.
If You Have Windows
Use MooPS. It has a DNS server built in that is pre-configured for use in this hack.
If You Have Mac OS X or Linux
On Mac OS X and Linux, you can simply install Berkeley Internet Name Daemon, or BIND for short. Refer to the BIND documentation on how to download and install BIND.
BIND for Mac OS X can be downloaded from http://www.versiontracker.com/
dyn/moreinfo/macosx/658.
BIND for Linux is usually included with the distro, so check your install.
If You Have Mac OS 9
If you’re running Mac OS 9, get your hands on MacDNS, a very simple DNS server that will do just fine for hacking DNS.

Wednesday, November 12, 2008

Enabling Personal Web Sharing (Macintosh)


Macintoshes have a Web server installed, but not enabled, by default.To enable your Web server, first make sure you run Apple’s Software Update to make sure your patches are up to date, and then do the following:
1. Open System Preferences.
2. Click Sharing.

Locking Down IIS

If you are running IIS instead of MooPS on Windows, you should lock down your IIS configuration
(because security is always key, even in closed networks). If you have not done so already, you should install and run the IIS Lockdown Tool, available for free from Microsoft at

http://www.microsoft.com/downloads/details.aspx?displaylang=en&FamilyID=DDE9EFC0-BB30-47EB-9A61-FD755D23CDEC.

If that URL doesn’t work, simply go to Microsoft’s Web site (http://microsoft.com) and search for IIS Lockdown Tool. Download the IIS Lockdown Tool and run it using the Dynamic Web Server (ASP Enabled) profile (just follow the prompts—it’s pretty self explanatory). Make sure the box for Install URLScan Filter on the Server is checked (this prevents certain types of hack attempts).
Once the IIS Lockdown Tool has completed its run, put the program away in a location you’ll remember so you can undo its changes later if you need to.To undo the IIS Lockdown Tool’s changes, simply run the application again and it automatically knows it’s installed and gives you options to remove its changes.

Installing MooPS

Download MooPS from the site mentioned earlier and double-click the installer to run it. You should be welcomed by the MooPS Setup Wizard, which walks you through the fairly straightforward installation Next, select the installation directory for MooPS. I suggest the default location of your Program Files directory, which is usually the C:\Program Files directory and is entered by default. Then click Next and then Next again and MooPS is installed.When MooPS has installed, click Close to exit the installer.

Get MooPS, the Free Web Server


There are many options if you don’t already have a Web server. If you have Windows, your best choice is MooPS, a free Web server and DNS server preconfigured for use in this hack. You can download MooPS from
http://seamonkey420.techrecipes.com/psp/Wipeout_moops.html.
If you have Windows 2000 or XP Professional and are already running IIS, you can still use IIS as the Web server—you’ll just use MooPS for the DNS configuration. If you have a Mac or are running Linux, there’s already a free Web server included with your system—Apache. Let’s go over how to install each one.
If you’re on a Mac or you already have a PC Web server, you can skip this step. Macintoshes since Mac OS 8 have had a service called Personal Web Sharing. Windows XP Pro and Windows 2000 machines have IIS built-in.
Before setting up any sort of server, especially if you will make it public, make sure you have the latest security patches. The last thing you need is for it to get owned by a hacker. Before installing any server product, make sure your machine is behind a firewall and is not allowing any external traffic. Before you allow other people (even you) access to services you provide, make sure your system is fully updated before and after you install server software. In Windows you do this via Windows Update, and on the Mac it’s through Software Update. Linux and other operating systems have various update paths. Also make sure any third-party server software is fully up-to-date, as the built-in update mechanisms in operating systems only update the operating system components, not applications.

Wipeout Pure: A Cool Game with a Fantastic Feature


They say most hacks are elegantly simple. They are so much sweeter when you can use a company’s own products to perform the hack. Such is the case with Web browsing on the PSP, where Sony’s own game— Wipeout Pure—has a fairly decent Web browser (well, enough to read blogs and the RSS feeds and lots of other stuff which we’ll get to in other chapters). Using tried and true DNS and Web server spoofing techniques, you can intercept Sony’s game’s calls to Sony’s Web servers and point all those requests to your own, hacked server. Of course, you should only do this on your local network, as Sony’s legal hounds would probably tear into your flesh with ferocious persistence, but this hack will work outside of your own network if you believe you have legal-bullet-proof powers.
While this hack will work on any PSP, it is generally intended to provide a Web browser to those who do not use a 2.0 PSP (such as software developers or those who want to run homebrew applications). Either way, by reading this section you should learn quite a bit about the art of spoofing.
Here’s what you’ll need:

  • A Web server (otherwise known as an HTTP Daemon, which you’ll download in a moment)
  • A DNS server (otherwise known as a Name Daemon, which you’ll download soon, too)
  • A PC or Mac that can run both of the previous applications (called the “host PC”)
  • Wipeout Pure PSP game
  • 802.11b-compatible wireless base station (or the host PC with an 802.11b-compatible wireless card and configured as a wireless base station)
What we’re about to do is trick the game Wipeout Pure.Wipeout uses its own Web browser to access Sony’s Web site to download extra content.What you’re going to do is redirect it to a different site (your Web server) by spoofing Sony’s Web site’s IP address (via your DNS server) so you can surf the Internet through that same browser and do whatever you want online (for the most part).

Tuesday, October 28, 2008

Export Your Internet Explorer Favorites


Now that your favorites are organized, you need to export them to a special HTML file so you can put that information in the PSP.
In Internet Explorer, select the File menu, and then select Import and Export. The Import/Export Wizard appears. Click Next to start the wizard, and then click Export Favorites as the action to perform.
Click the folder containing your PSP favorites and click Next. Now choose a location to save the bookmarks file by clicking the Browse button under Export to a File or Address. I suggest saving it on your desktop or in your My Documents folder so it’s easy to find (you can throw it away when you’re done with all this). Name the file “bookmarks. html” (without the quotes, and all lowercase). Click Next when you’re done, then Finish, and Internet Explorer tells you it has successfully exported your favorites.

How to Organize Your Favorites?


You may have a lot of favorites already saved in Internet Explorer. You likely don’t want them all on your PSP. Use the Organize Favorites option under the Favorites menu to organize the bookmarks you want on your PSP into a folder. I created a folder named PSP Links and placed all my PSP favorites in there.
If you do not know how to use the Organize Favorites feature of Internet Explorer, go to Tools, then Help, and click Contents and Index. Click Search and type organize favorites and click List Topics. Finally, click the topic Organize Your Favorite Pages into Folders.

Downloading Files with Sony’s Web Browser


Sony’s Web browser can also download music, video, and image files directly onto the Memory Stick inserted into your PSP for viewing in its various media viewing applications. It can also download any other type of file, which you can access via USB mode on your PSP or by placing your Memory Stick into a media card reader after it’s been downloaded. To download a file, simply find the link to the file you want to download and highlight it. Then go to the Web browser menu by pressing Triangle, and then select the File menu (the leftmost icon) and press X. Select Save Link Target and press X. You can change the filename to whatever you want, and set the destination.
If you want to save an image on the screen, highlight and follow the same steps, except choose Save Image instead of Save Link Target.

Sony’s Official PSP Web Site

Sony has an official PSP Web site that is bookmarked by default.Well, actually, you can’t delete the bookmark—you can either go to your own bookmarks or to Sony’s PSP site. Sony’s official PSP Web site is located at http://www.ps-portable.net. You can access the official PSP Web site by going to the bookmarks menu and selecting PSP instead of My Bookmarks. The PSP Web site has a host of neat things to do, from downloading game extras, to getting trailers for upcoming UMD movies to downloading images, photos, screen shots, and more. You can get the latest news from Sony on the PSP and buy gear for your PSP. Of course, this site will likely expand to offer you much more in the future, such as downloadable music, new games, and more, for a fee.
Using the My Account feature on Sony’s site requires registration on the PSP Underground site.While you can do this on your PSP, it’s a lot faster on a computer with a keyboard, and then you can just log in on your PSP and save your login information on it by selecting Remember Me on the login page.

Wednesday, October 15, 2008

How to Resolve Out of Memory Errors During Web Browsing?

To resolve most “out of memory” errors, you need to increase your cache.To change your cache size, press TRIANGLE to get to the Web browser menu, and then move to the toolbox icon and press CROSS . Select Settings and press CROSS Select Cache Settings and press CROSS. Press CROSS on the cache size (it defaults to 512K), and use your arrow keys to increase it to 2048. Press CROSS again, and then select OK and press CROSS to save your new cache settings.
Keep in mind that your PSP doesn’t have a lot of RAM (between 4MB and 32MB depending on the model), so some very complex pages may not load. If a page doesn’t load, it does not mean your PSP is broken.

Sony’s Official Web Browser

A few months after the PSP was released in the US (March 2005), Sony released a Web browser for the PSP in Japan. About a month after this, Sony released a U.S. version. The Web browser was part of a larger set of features in an update called System Update 2.0, which updated the PSP’s firmware to version 2.0. Along with the Web browser, the update provided for playback of the AAC (MPEG-4) audio format and more personalization features including wallpapers and themes. Photo sharing was also introduced.
The most anticipated feature was the Web browser, of course. Much to the chagrin of homebrew software developers, the required update would disable their ability to write and run homebrew applications on their PSPs. However, there’s a hack where homebrew developers can still get access to a Web browser by hacking one of Sony’s own products (as described in “Wipeout Pure: A Cool Game with a Fantastic Feature,” later in this chapter).

Sony’s “official”Web browser has a number of features found on regular Web browsers, sans keyboard support of course. The browser supports automatic scaling of pages to fit the PSP’s already high-resolution screen, Javascript (to an extent), bookmarks (called Favorites in Internet Explorer), saving files, submitting forms, and even proxy connections (for those on corporate networks).
The browser does not yet support Macromedia Flash or Java applets, but rumor has it Flash support is in the works. If you don’t have System Update 2.0 on your PSP, and you don’t want to run homebrew applications, you can update using your PSP’s built-in wireless Internet access, or download the update from Sony’s site at http://playstation.sony.com/psp.

Why Is It Called 802.11?


Many people wonder what the heck the 802.11a, b, and g stand for. The IEEE (Institute of Electrical and Electronics Engineers), the same people who brought your IEEE-1394 (also called FireWire, iLink, and so forth) is an established standards body that has defined many technologies via its internal open working groups (WGs). 802.11 is named this due to its IEEE working group being group 802.11. IEEE Project 802 is also called the LAN/MAN Standards Committee, or LMSC, and the 802.11 working group handles wireless LANs. Tens of millions of IEEE 802.11 devices have been deployed worldwide and are interoperable. IEEE 802.11 has many flavors. The most widespread today is 802.11b (named after IEEE 802.11 working group B), which operates in the unlicensed ISM (Industrial, Scientific, and Medical) band at approximately 2.45 GHz, and can transmit up to 11 Mbps. Newly available 802.11 flavors include 802.11a and 802.11g. 802.11a and g support speeds up to 54 Mbps (in the standard, proprietary solutions claim faster speeds), and operate in the ISM band, as well as the newly unlicensed U-NII (Unlicensed National Information Infrastructure) band, at 5.2 and 5.8 GHz.
Even though 802.11 is a standard, its availability is restricted in different regions of the world because of varying regulations. Generally, 802.11b in the United States has 13 broadcast channels available for use (3 optimal ones because they are non-overlapping), and 802.11a in the United States supports 140 channels, with 12 non-overlapping optimal channels. However, in France and Spain, the various channels available to 802.11b and g users are severely limited (1 non-overlapping channel), while there are actually more channels available in Japan (13 channels, 3 non-overlapping). Take note: Even though 802.11a provides so many optimal channels, the international legalization of its 5.2 GHz frequency use has not been standardized, so outside-U.S. deployments may run into broadcast legal issues. Another note: The 5.2 GHz U-NII spectrum is also used by microwave landing systems to help planes land in bad weather.

Wednesday, September 17, 2008

Speeding Up Wireless Internet Access

To save battery life, the PSP defaults to a “wireless power saving” mode, which lowers the transmit and receive speed of the built-in wireless. To improve wireless performance, especially for Internet access, you should turn that mode off. Of course, it will eat more battery power, but play around with it and see what you think.
You may actually need to disable the wireless power saving mode, as some wireless access points and devices aren’t compatible with the power saving feature of the PSP, so knowing how to do this may help you when you can’t connect in certain places.
Follow these steps to disable wireless power saving mode:
1. Use the PSP Navigator to select Settings, and then Power Settings.
2. Select the WLAN Power Save option and press X to select it.
3. Set the option to Off and press X again.

How to Create an Ad-Hoc PSP Wireless Profile?

If you’re just going to do some quick gaming with friends, you all need to have the same network name, or SSID, so you can all connect with each other. Once everyone has the same profile, you can all connect and play your games together.
The PSP doesn’t actually let you set your SSID in Ad Hoc Mode, so it just defaults to a generic name beginning with PSP, followed by a number of different characters. This can vary depending on the game you’re playing, too, as some games will set a different SSID to differentiate the PSP hosting the game from the other PSPs in the vicinity (which may be hosting games, too). Unfortunately, this means anyone with a PSP and the same game could potentially join in your game (if your game supports uninvited joins), so feel free to be paranoid and check to see who’s around you before you start a wireless match.
If you switch to Ad Hoc Mode, you will have to switch back to Infrastructure Mode at the Network Setting menu before you can use your PSP in infrastructure mode again.
Follow these steps to set up an Ad Hoc network:
  1. Use the PSP Navigator to select Settings and then Network Settings. Select the Ad Hoc Mode option and press X
  2. Set the channel to Automatic and press X.
  3. Press X to save the settings.

How to Set Up a WiFi Networking Profile

The PSP’s networking capabilities are very similar to a Macintosh’s, where you can set up different network profiles for use in different locations.
To set up a network profile, go to the PSP Navigator, select Settings, and then select Network Settings. You are given two options, both of which pertain only to wireless networking—Ad Hoc Mode and Infrastructure Mode-3). If you’re not familiar with the difference between the two, read the sidebar “Wireless Modes in Focus: Ad Hoc and Infrastructure.” Ad Hoc Mode is generally used when playing head-to-head with multiple PSPs in close proximity (10–20 feet), as it doesn’t require a base station. Infrastructure is useful when there are multiple people in different rooms and you use a central base station to connect.
It’s actually a good thing that most PSP games limit wireless play to eight players. As wireless networks get more and more crowded, the devices’ transmissions adversely affect the overall available bandwidth and you could lose data and therefore have poor gameplay. Remember, when you’re on an 11 Mbps wireless network, you’re sharing that bandwidth with everybody else, so the more you do on the network, the less bandwidth that’s available for others. This is especially true if you’re trying to play a PSP game with eight people while someone’s downloading a huge file and printing a large document over your wireless network—there’s a good possibility of losing packets and having issues with gaming.
Let’s go through configuration of both network types. Some games may actually require one type over another—the back of the box says “Wi-Fi Compatible (Ad Hoc/Infrastructure),”. Some games may not support wireless play at all and won’t have the Wi-Fi Compatible logo on their box at all.

Turning Wireless On and Off

To enable and disable the built-in wireless of your PSP, simply flip the switch on its left side. Up enables wireless and down disables it. This doesn’t turn wireless on, however. Games and applications selectively turn the wireless feature on and off, so you can safely leave the switch up and it will only actually be “on” when an application needs it.

Friday, September 12, 2008

PSP Firmware Versions and Why They Matter


The PSP has a “flashable” firmware, meaning it can be updated with bug fixes, and upgraded with new capabilities. This enables Sony to support new technologies as they emerge, address vulnerabilities in the PSP software (such as Web browser and buffer overrun vulnerabilities), and keep the product competitive as the market evolves. Unfortunately for us hackers, Sony removed the ability to program the PSP on our own starting with the 1.51 “update,” which featured “security updates”—just another way of saying “we don’t want software developers.” Of course, you don’t have to update to run most games on your 1.0 or 1.5 firmware PSP, and there are utilities, such as the WAB Version Changer to get around such issues.

If you are not going to program the PSP, the upgrades from Sony can be quite a boon.With firmware update 2.0, officially named System Software 2.0, Sony added a Web browser, enhanced wireless network access (supporting additional encryption technologies such as WPA and PSK), and support for MPEG-4, or AAC, audio files. These new features greatly enhanced the PSP’s already impressive media capabilities. If you want to program a 1.5 PSP and still have these capabilities.

  • 1.0 Original Japanese release.
  • 1.5 Original U.S. release. Added copy protection, disabling the native ability to run homebrew applications. The KXploit, covered in Chapter 19, “Running Homebrew Applications,” handles running these applications on this firmware. A notable change in the U.S. version: the X and O button functionality was reversed (O goes back and X is select, whereas it was the opposite in Japan).
  • 1.51 Added “security updates,” which simply disabled the KXploit’s ability to run. No games required the 1.51 update. If you have a game that requires 1.51, and you have 1.5, you can use the WAB Version Changer to trick the PSP into thinking it’s running 1.51.
  • 1.52 Added “security updates” as well as UMD Music support. No games appeared to require the 1.52 update. If you have a game that requires 1.52, and you have 1.5, you can use the WAB Version Changer to trick the PSP into thinking it’s running 1.52.
  • 2.0 Added a Web browser, MPEG-4 audio support and additional image format (TIFF, GIF, PNG and BMP/Bitmap) support. New video playback capabilities were added, including a “Go To” format and 4:3 “Full Frame” video playback mode. Personalization features were added, including the ability to change the color of the background and to add a wallpaper, or background image. Also provided additional “security updates” and some new operating-system functionality. Some games check for the existence of 2.0 firmware. More information about this massive update is available on Sony’s Web site.

PSP Battery Life

Compared to other portable gaming systems, the PSP is not only more powerful, it’s also more power hungry. Indeed, with a 333 MHz processor, ultra-bright widescreen color display, wireless networking, and an optical UMD drive to run, the battery is working overtime to make sure you stay entertained for hours on end. Thankfully, Sony has included a rechargeable 1800 mAh Lithium Ion battery to help out—normal alkaline batteries wouldn’t survive the load for long and would be darn expensive to replace all the time. On a full charge, you will get (and independent organizations have confirmed this) up to six hours of battery life when playing video games, and up to four hours for movies. This is assuming you’re running the screen at half intensity and half volume with wireless off. I tend to run with the brightness and volume all the way up, so take about 10 percent off that figure if you play the same way.

• Game Boy Advance, 15 hours
• Game Boy Color, 10 hours
• Game Boy DS, 6–10 hours
• PSP, 6 hours

Full Technical Specifications of the PSP


Here are the fairly official technical specifications of Sony’s flagship handheld:

· Size: 170 mm (6.7 in) in length, 74 mm (2.9 in) in width, and 23 mm (0.9 in) in depth, weighs 280g / .62 lbs (Source:Wikipedia)

· Processor: 32-bit MIPS “R4000” 4KE or 24KE, dual-core. Primary core is for standard system functions, including hardware-based data decryption. Second core, called the “Virtual Mobile Engine,” is for graphics processing, including native H.264 decoding.

o Speed: 1-333 MHz (although Sony has made mention to a cap of 222 MHz to conserve battery life) Programmers can get around the 222 MHz barrier in code.

o Runs on 0.8 to 1.2 volts

o Designed using a 90-nanometer process

· Graphics: Runs at 166 MHz, reconfigurable to handle particular processing tasks.

o 2 megabytes video memory

o Supports a maximum of 33 million polygons/second, although the effective polygon performance is likely much lower (many critics don’t like the “max” polygons rating because it excludes the use of effects like lighting, fog, and so forth)

o 664 million pixels/second maximum fill rate

o 512-bit interface

o Supports 16-bit and 32-bit color modes (32,768 colors and 16.77 million colors)

· Audio: Supports Stereo sound, Dolby Headphone sound. Supports playback of WAV, ATRAC and MP3 (MPEG-1 Audio Layer 3) audio in Firmware 1.0 and 1.5, and adds AAC (MPEG-4) audio in Firmware 2.0.

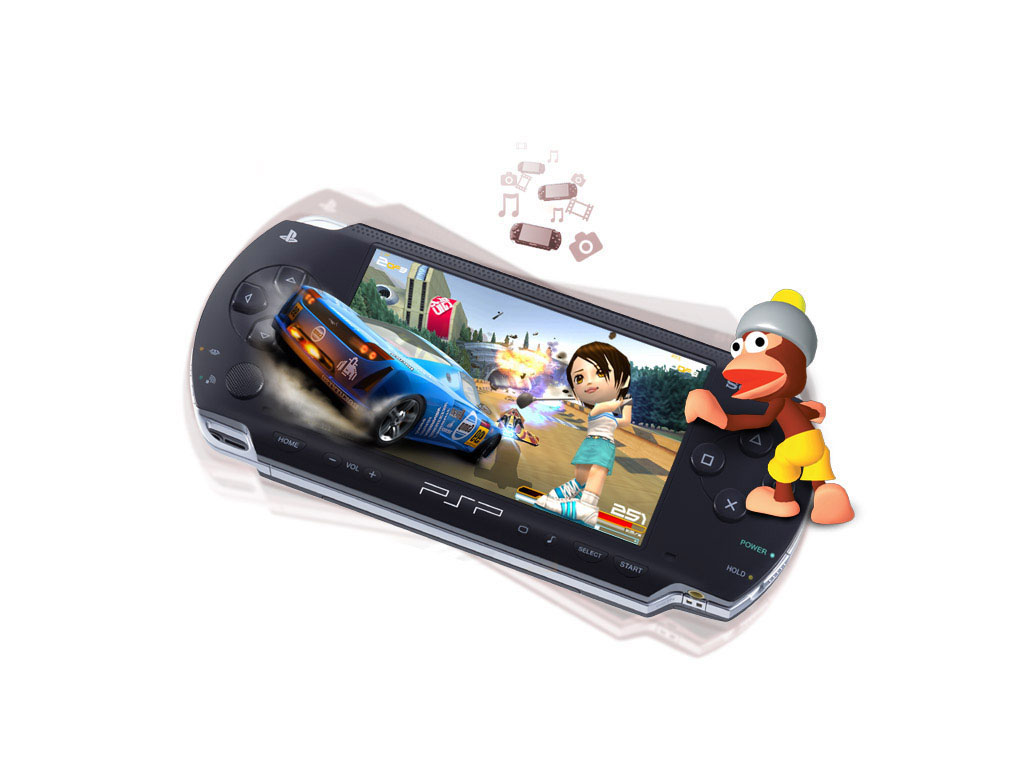
· Display: 4.3” (diagonal) 480 × 272 Widescreen display, 16:9 aspect ratio, just like widescreen DVDs and HDTV

· RAM: 32MB of RAM. 4MB of DRAM; half (2MB) is connected to the main core, and the other 2MB is for media processing functions.

  • Storage:The PSP has the following storage capabilities:
    • Sony Memory Stick Duo slot takes only Memory Stick Duo media

o UMD discs support up to 1.8GBeach and basically any type of data. Official formats include UMD-Game, UMD-Video, and UMD-Music. This appears to be based on Sony’s MiniDisc format.

o USB 2.0 port supports data transfers up to 480 megabits/second. Supports sharing of files on inserted Memory Stick with a USB-capable computer.

· Power: Includes 1800 mAh Lithium Ion (LIon) battery, provides 4–6 hours of battery life (Sony offers an official 220 mAh battery as well, and third parties such as Datel have batteries providing 3600 mAh).

    • A/C charger included with package yields 2000 mAh
    • Capable of charging using power provided via a computer’s USB 2.0 port
  • Networking: Built-in 802.11b (11 megabits/second max throughput) wireless supports both ad hoc (computer-to-computer) and infrastructure (device-to-access point) modes.
    • IrDA (Infrared Data Association) line-of-sight communications
    • IR Remote (SIRCS compliant), although no “official” remote control software was available at the time this book went to press
    • Potential to use USB port for other networking devices, should they ever beReleased

· Navigation system: Uses Sony’s XMB, or Cross Media Bar, interface, used in some Sony TVs and their PSX product. (I call this the “PSP Navigator” in this book.)

  • Region coding: Supports region coding of games, music, movies, and photos on UMD discs, similar to how DVDs do the same thing to prevent media use in other regions of the world
  • the world

Friday, August 22, 2008

PSP Random Icons Homebrew


Download Here

File Type zip


Filesize 301.98 KB

Green Summer PSP Theme


Download Here


File Type zip


Filesize 481.92 KB

Black System PSP Theme


Download here

File Type zip


Filesize 350.91 KB

Monday, August 11, 2008

Modify the Color of the PSP Activity LEDs

Ever wish that the Memory Stick Duo Activity LED and the WiFi Activity LED on your PSP were pink and chartreuse? Well, these colors might be a bit of a stretch, but this hack will show you how to change the default LEDs to colors of your choice.

There is no doubt that the gaming world has come a long way from producing gaming systems that look very boxlike to a new age of sleek and stylish systems like the PSP. But no matter what, each new system rolls off a production line of unoriginality. As consumers, we love to add our own style. So here is a tutorial that describes the process to replace the original Memory Stick Duo Activity LED and the WiFi Activity LED with different LED colors of your choice. This is pretty simple to do; however, I don't suggest you try this at all (unless you are sure you can do it), since the cost of the PSP and the size of the components you'll be working with both lie at their respective extremes. This will void your warranty and other fun stuff like that.

Seriously, if you are a novice at such things, do not try this. Get your soldering iron guru friend to help out.

Now, with the "Don't try this" warning out of the way, let's move on to making the PSP more personally aesthetically pleasing.

Things You Will Need
  • Sony PSP (any firmware version)
  • Memory Stick Duo (required for testing)
  • Small Phillips head screwdriver
  • Soldering iron, 15 watt or less (a fine tip helps)
  • Surface Mount LED (type 0603 of your choice of color; find them at http://www.lsdiodes.com/smd)
  • Multimeter (for testing polarity on the LEDs)
  • Miscellaneous utilities (Xacto knife or razor knife, solder braid)
  • Soft cloth (optional)

How to View the New Backgrounds?


The background of the current month should already appear changed when you return to the PSP's main menu. If it doesn't, or if you want to test to make sure that all of your images work, navigate over to Settings Date & Time Settings and hit the X button. Select Date and Time from the list and hit the X button again. Change the month and hit the X button.

If the screen turns bright white, don't panic. The PSP is only allotted so much memory for displaying the background images, so if the image that is currently loaded is a little larger than normal, and the new image that you are trying to load is also a little too large, the PSP won't be able to handle both images simultaneously, and the bright white screen can be the result of its failure to load the image. This shouldn't happen when the date normally changes between monthsonly when you force a change using this method.

Hit the X button again to bring the month back up, and hit the X button a third time to confirm without changing the date. If the picture is properly formatted, it should load now, since it no longer has to compete with another image for that memory space. If it doesn't load, make a note of which image it was so that you can replace it with another image the next time you run PSPersonalize.

Keep switching the date month by month, to make sure all the background images you created or downloaded off the Internet properly load. If they don't load, simply set up some new images and run PSPersonalize again. Keep doing this until you have all of the different months on the PSP loaded with your favorite background pictures. Enjoy!

Using PSPersonalize


On the PSP, navigate to Game Memory Stick and hit the X button. You will see PSPersonalize and a file called Corrupt Data next to it. Ignore the Corrupt Data file, select PSPersonalize, pause for a moment to notice the cool background and audio for PSPersonalize, and then hit the X button.

The same PSP animated screen that plays whenever you run a game will be displayed. After this graphic is displayed, a black screen with white and yellow text will appear:

copy
ms0:/01.bmp
to
flash0:/vsh/resource/01.bmp
are you sure?
O= OK, X = Cancel

The first location, ms0:/, is the root directory of your Memory Stick, and the second location, flash0:/vsh/resource/, is the folder where the background images are stored on the internal flash memory of your PSP. Hit the O button to replace January's graphic with the picture you have named 01.BMP and placed in the root directory of your Memory Stick.

After you hit the O button, "please wait…" will appear momentarily in the upper-left corner of the screen while the file is copied over, and then you will be returned to the previous screen, only now it will read 02.bmp as the file is being copied over. Continue hitting O at each screen until you have replaced all 12 files. Once this is done, a small note will appear in the upper-right corner of the screen, reading "finished…". Hit the Home button on your PSP. A prompt will come up asking "Are you sure you want to quit the game?" Select Yes and hit the X button. You will be returned to the main menu of your PSP.

Now all the new images should be copied over to your PSP's internal flash memory, so the next time you mount your Memory Stick on your computer, you can feel free to delete all the .BMP files that you placed there for the transfer.

Remember, if you want the same background year-round, simply make 12 copies of the same file and name them 01.BMP through 12.BMP. Likewise, if you want the background graphic to change only in July, make just one file, 07.BMP, and hit X each time you are prompted by PSPersonalize to copy the file until it asks whether you want to copy ms0:/07.bmp. Now that you know how to use PSPersonalize, you can replace the images of individual months whenever you like.


Sunday, August 3, 2008

Angry PSP Theme


For PSP with firmware 3.71 M33+ and with 3.80 M33+
Please put the PTF file into X:/PSP/THEME/ directory.
Then choose the theme in Settings > Theme Settings.
Download here

Blue Robot PSP Theme


It works with PSP firmware 3.71 M33+ and with 3.80 M33+
Copy the PTF theme file to your X:/PSP/THEME/ directory.
Choose the theme in Settings > Theme Settings.
Download here

Yellow Robot PSP Theme


This theme works with firmware 3.71 M33+ and with 3.80 M33+
Copy the PTF file to your X:/PSP/THEME/ directory. Choose the theme in Settings > Theme Settings.

Download here

Friday, July 25, 2008

How to Prepare Your PSP Background Images?


For this hack, you're going to need 12 images (one for each month of the year). If you want your background image to stay the same year round, you're still going to need 12 separate, but identical, image files (or you will need to continually keep changing the date on your PSP to the one month containing the background picture you want).

You will need to use whatever image editing software you have on hand to convert your images to 24-bit Windows bitmap files less than or equal to 300 x 170 resolution. I've seen recommendations online stating that you need to keep the images less than or equal to 150KB in size as well; this is probably the ideal, but I've made this work with a few files weighing in closer to 200KB in size. The main issue here is that larger file sizes will take longer to load on your PSP, and the larger the size, the more you risk the image either not loading or, worse, crashing your PSP.

Once you have converted the images into 300 x 170 pixel images, you will want to rename them with two digits followed by .BMP for each of the 12 months of the year. For example, whatever image you want for January needs to be named 01.BMP, and whatever file you want for November needs to be 11.BMP. You should have files named 0112, all ending in .BMP, when you are finished.

Preparation for PSP Background Image Modification

You already know how to get your favorite color in the background of your PSP, but wouldn't you rather put your own custom images in there?

Thanks to the great movement of homebrew software for the PSP thriving on the Internet, you can now replace the default color backgrounds on your Version 1.01.5 PSP with pictures of your choosing. Be warned, however, that if you choose to employ this method, there is no turning back. Changing the images is a permanent change. You can replace them later with newer images, if you like, but if you want to return the PSP to its default background set, you're either going to have to do some slightly more advanced hacking to back up the original images before you do this hack, or dig around on the Internet for someone else's copies of the images.

If you have a PSP with Version 2.0 of the firmware, Sony has added a Wallpaper setting to your PSP so that you can do this without any hacking. Simply navigate to Settings Theme Settings, hit the X button, scroll down to Wallpaper, hit the X button again, and choose Use. Navigate to any picture under Photo on your PSP and hit the X button to view the photo. While viewing, hit the Triangle button to bring up the control panel. Navigate to the second control on the top row, "Set as Wallpaper," and hit the X button. The image you were viewing is now the wallpaper image for your PSP.
  • A Sony PSP running Version 1.5 of the firmware until the homebrew community figures a way past the roadblocks Sony put in place in later versions of the firmware, this hack will only work on PSPs running v1.5.
  • PSPersonalizethis is the homebrew app that makes the hack work. The file doesn't have a home page on the Web, but you should find it easily enough in the popular PSP homebrew sites; a quick Google search for "PSPersonalize" should turn it up, and you can also look for a link to the files on the site I've set up to go along with this book (http://www.psphacksthebook.com).
  • A Memory Stick and some way to copy files from your computer to your Memory Stick .
  • Some basic image editing software.
  • Some images.

Thursday, July 17, 2008

Add a JavaScript Keyboard to Your PSP Web Portal


Make your web surfing activities a whole lot easier by providing an alternate QWERTY keyboard in place of the PSP's internal keypad, making your PSP-based web surfing as simple as Up-X-Down-X-Down-Right-X-Down-Down-Down-X.

Getting online is the easy part! Once there, you quickly discover that web surfing is not as simple as typing in a URL or clicking on a link. Since the PSP is missing a standard keyboard, you are forced to use its internal keypad that has even less functionality than a cell phone. If you are planning on using the browser hack for more than just goofing around, then this form of data entry quickly gets old.

To help overcome this challenge, I offer you a JavaScript keyboard that not only provides you with an easy-to-use QWERTY keyboard with all your standard alphanumeric characters, but also gives you some extra features, such as one-button http:// entry and a URL checker to make sure that you typed everything correctly before attempting to load the URL.

JavaScript in PSP


The PSP's web browser is no slouch; although it's not as feature-laden as the latest desktop browsers, it holds its own pretty well. If you know a little HTML, CSS, and JavaScript, you can create DHTML applications that run right in the browser. For example, here's a short program that draws a chunky version of the Mandelbrot Set, one of the most famous fractals (objects that exhibit self-similarity at various levels of detail but with an organic irregularity): Download the sample script here

You can save this as an HTML file on your PSP's memory stick, navigate to it with the 2.0 firmware's web browser, wait a minute or two, and then see the fractal displayed (albeit rather crudely) on your PSP's screen.

In fact, you could combine DHTML with Perl to create a read-only copy of your address book, calendar, or favorite recipes on your PSP. Create some attractive styles to present the data, use JavaScript to create navigation features, and use Perl to extract the data and dump it into an HTML file that acts as the back-end database for your styles and scripts.

Using the LuaPlayer


If C and C++ aren't your thing, and you're feeling a little rusty in the coding arena, then you'll most likely want to check out the LuaPlayer (http://www.luaplayer.org/). To work with LuaPlayer, all you need is a PSP running Version 1.0 or 1.5 of the firmware, and a text editor on your computer. The LuaPlayer site features a rather good step-by-step tutorial (http://www.luaplayer.org/tutorial/index.html) to this PSP scripting language that walks you through creating a basic "Hello World" test program, working with images, working with animation, and an introduction to coding for the controls on the PSP. There are several sections not yet complete in the tutorial, but considering the amount of people in the PS2Dev Forums (http://forums.ps2dev.org/viewforum.php?f=21) who are using this tool to easily program for the PSP, you can most likely find some guidance with a few carefully placed questions.

One of the advantages of using Lua is that you can test applications on a computer running Windows before you deploy them to your PSP. This eliminates the need to copy your source code over to your PSP every time you make a change. Instead, you can do all your testing and debugging on your PC, and send it to your PSP when you are ready to play it. For more information on the Windows version of Lua Player, see http://forums.ps2dev.org/viewtopic.php?p=22332#22332.

Here's a simple Lua program that runs on the PSP. You should save it as script.lua, and follow the instructions included with the Lua Player to run it on your PSP. This is a program that draws an @ character onscreen at the specified x/y coordinates. You can move the directional pad to move the character and leave a trail. Download the sample script here

Saturday, July 12, 2008

ScriptScribbler PSP Programming Tutorials


ScriptScribbler (http://www.scriptscribbler.com) currently offers three tutorials by Brad Dwyer on programming for the PSP, and it looks as though there will continue to be more tutorials forthcoming in the future. The first section of the tutorial (http://www.scriptscribbler.com/psp/tutorials/lesson01.htm) walks you through setting up a development environment on Windows. The second section walks you through creating your first program
(http://www.scriptscribbler.com/psp/tutorials/lesson02.htm), a basic "Hello World" program for the PSP. The third section, serving as a programming primer, is currently the most useful (http://www.scriptscribbler.com/psp/tutorials/lesson03.htm), as it serves as a "crash course in the basics of C programming for the PSP."

What is exactly PS2Dev.org ?


The PS2Dev Network (http://www.ps2dev.org) has a plethora of information for developing for both the PSP and PS2. When you first start clicking around on the site, you'll probably head straight to the PSP Tutorial section (http://ps2dev.org/psp/Tutorials) and find yourself staring at an empty page. Don't panic. Most of the information you would want to find has made its way over to the PS2Dev Network wiki (http://wiki.ps2dev.org/). If you navigate to the Programming FAQ section of the wiki (http://wiki.ps2dev.org/psp:programming_faq), you'll find a section called "How do I get started in PSP programming?" Here you will be confronted with the cost of entry into the world of PSP programming: familiarity with C or C++.

If you are on Windows, you will need to download Cygwin (http://www.cygwin.com/), which will allow you to compile the Unix programs needed to code for the PSP. If you are on Mac OS X or Linux, you should be able to compile the PSPSDK and PSP tool chain, as long as all the necessary dependencies are in place. Both of these tools are available via the PS2Dev Net-work's PSP Project page (http://ps2dev.org/psp/Projects).

Do you love your PSP?

If you think you have the chops to code your own app for the PSP, this tips will show you where to get started.

Do you love your PSP?, but you're disappointed that it doesn't have a program for easily viewing all of your recipes? A paint-by-numbers program? An advanced statistical analysis tool? A PSP port of Snood? Why not code your own application?

Unfortunately, the buy-in price to be a Sony-certified programmer for the PSP is a bit beyond most of us mere mortals, so the only real way to get into coding for the PSP is to dive right in to the homebrew scene. Fortunately, there's lots of very valuable information online for the would-be PSP coder, and there's a very active community of other coders working away in their free time to make the PSP a vibrant homebrew platform.

Homebrew applications can't be loaded on a PSP without some trickery, and it's a given that the most recent (2.0, as of this writing) version of the firmware is immune to such trickery. So, if you want to run true homebrew applications, you're going to need to make sure that you get your hands on a PSP running Version 1.0 or 1.5 of the firmware. If you're a cracking savant, however, please by all means figure out a way to run homebrew on later firmware versionsthe Internet will herald your name far and wide.

But, if you're not inclined to invoke the trickery needed to load homebrew, you're running the latest firmware, or you just want to do some elementary programming, you're not out of luck. The PSP web browser is powered by JavaScript, HTML, and CSS, the technologies that come together to give you Dynamic HTML (DHTML). With these, you can write some simple and attractive applications that run right on your PSP's web browser.

Friday, July 4, 2008

Control iTunes from Your PSPControl iTunes from Your PSP

If you are on a Mac, you can use your PSP as a remote control for iTunes.

If you're running Mac OS X, you can easily use your PSP as a remote control for iTunes via a program called PatioTunes (http://www.mindola.com/patiotunes/; $15 USD). Unfortunately, no similar package was available for Windows at the time of this writing.

Originally, I wanted this hack to be a full-fledged remote control, using the PSP's IR port to control my home entertainment system. Unfortunately, so far, this hack has proved to be a bit beyond my abilities. Phillip Torrone has also been working on an IR remote solution for the PSP, and if either of us ever figure it out, we'll post the results on the book's web site.


Download, install, and launch PatioTunes. The program will launch and tell you where you need to point the browser on your PSP. If you're on a PSP running Version 2.0, this will work like a charm. If you're using "Find Yourself a PSP Web Browser" on another version of the firmware, you'll need to make sure that you've created your own portal so that you can redirect the browser to a local address on your local area network.

If you launch PatioTunes' Preferences, you can set the refresh rate for the PatioTunes' interface in your PSP's browser. You can also adjust the port over which the connection occurs, in case there are any conflicting ports or special restrictions on your network.

Launch the browser of your choice on your PSP and navigate to the URL that PatioTunes provided for you. If you are on Version 2.0 firmware, then I recommend that you add a quick bookmark to the PatioTunes main page. There are three tabs in the upper-right corner of the page: Playlists, Artists, and Search. Playlists lists all the different playlists in your iTunes Music Library, but no songs will appear until you actually select a playlist and then click the little gray arrow icon to the right of the drop-down menu. The Artist menu displays all the songs by the currently playing artist.

The Search menu lets you search through your iTunes Music Library, either by song title, artist, album, or a combination of the three. One nice feature is that after you conduct a search, it is added to a temporary playlist called "PatioTunes Search."

There are minimal controls at the bottom of each page, featuring previous track, next track, and play/pause. You can also use PatioTunes to remotely create a playlist or increase the volume in iTunes.

This is a great little application that you can really make shine by either connecting your computer to your entertainment system, or by using AirPort Express and AirTunes to stream music playing from your iTunes Music Library to your stereo. All it's lacking, and a feature that I'd like to see in the next version, is an album artwork feature that would display the album cover associated with the currently playing track.

Now you can stroll around your house, browsing the Web on your PSP, and switch over to PatioTunes whenever you want to change the currently playing track. Have fun!

Controlling Winamp with your PSP


Another web server you could set up is a plug-in for Winamp called BrowseAmp (http://www.browseamp.com/). This program will set up a mini web server that uses the same kind of special URLs to send commands to the Winamp player running on your computer. I've put together a skin that looks good on the PSP screen. You can find it posted on my site (http://psphacks.blogspot.com).

I have a lot more ideas on how to improve this system. Right now, navigation is clunky because every button press causes the page to refresh. This is the same reason why PSP IRC (http://pspirc.com/) keeps refreshing the entire screen. I want to explore sending the commands to the WACI using an IFrame or XMLHTTPRequest object, but as far as I know, these basic HTML features are not implemented in the Wipeout Pure browser.

Controlling Audio/Video Equipments with your PSP


By using a controller device called the WACI NX (http://www.waciworld.com/), you could turn on the TV, turn on the Xbox, switch to the correct input on the TV, and send the Play command to XBMC, all in one button press on your PSP.

So far, I have the ability to turn my lights on and off, and I have full control (play, stop, pause, and menu) of my DVD player, TiVo, and high-definition TV, all wirelessly from my PSP. I can also send commands to my pre-2.0 PC running Winamp to tell it to play, stop, and pause my music, or even browse my playlists.

To do most of the controlling, I used this tiny web-server control box called the WACI NX. It's great because it has an HTTP and FTP server and uses regular HTML to issue the commands, making it the perfect match for my pre-2.0 PSP, which does not support any fancy JavaScript or DHTML. The PSP talks to the WACI NX via WiFi through the network. In turn, the WACI emits the IR signal to the TV through one of my IR emitters, just as though I had pressed the button on the remote.

The WACI NX has a built-in IR Learner, so you can grab all of your remotes, learn all the button commands, and save them in the WACI to be played back and emitted later. You could even do macros so it sends out a sequence of button presses with a specified delay between each button press.

The pages it hosts are constructed using layers and tags. I put an image map on the graphics and created some HTML pages with special links, which are crafted so that when the PSP highlights and clicks on a spot on the image map, it instructs the WACI NX server to send an IR signal to my A/V equipment or triggers its relays to cut power on the lights.

The actual links are name value pairs going to a script I made on the WACI NX.

http://192.168.1.102/rpcpost.asp?method=IRSend&Param1=1&Param2=DVD&Param3=Play


That script is written to execute the IR Send and then redirect back to the referring page. To change which command I run, I just change the URL string in my link.

I'm sure that if you rigged something up, you could do something similar with special software that runs on your PC. However, by using the WACI, I have a dedicated piece of hardware whose only function is to send commands to my stuff, no matter which interface I create to control it. Unlike Sony, which hides its protocols, the WACI NX has an open protocol that you can access from just about any web programming language. I can program using Flash, ASP, HTML, JavaScript, C#, C++, and Java. It's great for developers, and fairly simple to get started using the provided sample code. For more info on the WACI NX, you could check out WACI World (http://www.waciworld.com/).

Wednesday, June 25, 2008

Setting up the DNS Hack

Are you one of the lucky few living in the world of tomorrow with an entire home network that actually networks control of your home? If so, wouldn't it be nice to control your home wirelessly with your PSP? Read on to find out how.

When the Wipeout Pure browser hack came out, I saw someone controlling his Xbox Media Center from his PSP browser. It's great that you can control XBMC from your PSP, but what if your Xbox isn't on, and your TV isn't on, and your TV is not on the right input? You still have to get up or find the remote and adjust all of that.

I've come up with my own solution.

This hack first appeared on LiquidIce's PSP Hacks and quickly spread around to various web sites (go to http://psphacks.blogspot.com/2005/04/psp-home-control-10.html).

The first step was to be able to redirect the Wipeout Pure browser to any URL I wanted. To do that, I turned to MooPS (http://www.layouts.xbox-scene.com/main/filemanager/index.php?action=downloadfile&filename=SetupMooPS_1.0.1.rar&directory=Software&), which is a DNS/web server that you run on your Windows computer. It automatically forwards requests for http://ingame.scea.com to the URL of your choice. For another way to set this up.

If you have Version 2.0 of the firmware, you can simply navigate to the page you create rather than bothering with this redirect, which is only necessary due to the limitations of the Wipeout Pure browser.

Configuring Your PSP


You will now need to configure your PSP to use another DNS server. Follow the instructions discussed in that hack, but instead of entering the IP address of a web portal on the Internet, enter the IP address of your DNS server. Now fire up Wipeout Pure, choose the connection you just created/edited. Nothing too fancy, but the more links you add to the HTML, the more impressive and useful your web portal will be.

Congratulations! You can now create and access custom web pages from your PSP.

If you want your web portal to be accessible to other devices via the Internet, there are a few changes you must make to the method outlined above. First, you will need to change the following entry in scea.zone:

ingame A 192.168.0.100


to:

ingame A XX.XXX.X.XXX


where XX.XXX.X.XXX is the external IP address given to your computer/router. You can find out what this is by going to http://www.whatismyip.com.

The next thing you must do is set up your router to forward incoming traffic on ports 53 and 80 to your DNS/web server. Connecting to a web interface built into your router usually allows you to do this. Consult your router's documentation on how to forward ports to individual machines on your network. You will need to forward ports 53 (UDP) and 80 (TCP) to your web server's internal IP address (i.e., 192.168.0.100, as used earlier).

Finally, change the DNS setting on your PSP to use your computer/router's external IP address instead of your web server's internal IP address.

You should now be able to access your web portal from home or anywhere else.

The Web Server


Now that it is possible to have your PSP access the IP address of your choosing, it's time to set up a web server from which you can serve your custom web portal.

Like the DNS server, the first step is to install a web server on your computer. If you're using a Mac, you can turn on the preinstalled Apache web server by going into System Preferences, clicking the Sharing icon, and checking the box next to "Personal Web Sharing." If you're using Windows or Unix, you will need to install a web server such as Apache (Version 2 suggested). Apache is an open source web server that powers many commercial web sites. It can be downloaded at http://httpd.apache.org/download.cgi. If you're using Windows, you will want to download the .msi install package and follow the instructions that come with it. If installing Apache in a Unix environment, you may be able to find a precompiled install package for your distribution. Otherwise, you'll have to compile the source code yourself and continue installation from there.

Like DNS servers, there are many web servers available. Also, if you have one already installed, there is no reason to install another.

When the PSP makes a request from Wipeout Pure, it asks for the /wipeout/index.html file. So what we must now do is create a file named index.html and place it where the PSP can access it.

Use this html file

Next, you need to create a directory called "wipeout" in your web server's root directory. On a Mac, the root directory will be /Library/WebServer/Documents, so you will create the directory /Library/WebServer/Documents/wipeout (this is not to be confused with the Library folder in your home directory). If you installed Apache in Windows, you will want to create the directory in C:\Program Files\Apache Group\Apache2\htdocs. Then, simply place index.html in the wipeout directory.

If you are using Apache in Unix, or are using another web server, consult the server's documentation to identify the root folder from which web pages are being served.

That's it! Now you can test it using your PSP.

Monday, June 16, 2008

How to Set Up the PSP DNS Server?


Before you can start serving web pages to your PSP, you need to first trick the PSP into believing that your web server is someone it's not. When you load up the "Downloads" section of Wipeout Pure, your PSP attempts to retrieve data from the following domain: ingame.scea.com. Normally, the IP address returned by your Internet service provider's DNS server would belong to Sony and would direct you to downloadable Wipeout Pure content. However, by setting up your own DNS server, it is possible to "trick" the PSP and return the IP address of a web server of your choice.

The first step in setting up a DNS server is installation. If you are using a Mac or a Unix variant, the most common DNS server used is BIND. If you are using Windows, a good (and free) DNS server is TreeWalk DNS (http://www.ntcanuck.com). Installation guides are included with both of these server packages when you download the software, and are pretty straightforward. Further, these are just recommendations; there are dozens of DNS server software packages available for virtually every platform.

Once installed, you now need to configure your DNS server to resolve ingame.scea.com to the IP address of your web server. There are two files you will need to create and edit: scea.zone and named.conf. First, we will create the scea.zone file. Using a text editor, create a new file called scea.zone (make sure there is no .txt appended to the filename) and type in the following:

; scea.zone
; scea.com db file
$TTL 86400
@ IN SOA scea.com dummy.scea.com. (
050622 ; Serial
10800 ; Refresh
3600 ; Retry
604800 ; Expire
86400 ; Min TTL
)

; Addresses for canonical names

NS 192.168.0.100
A 192.168.0.100
ingame A 192.168.0.100
webcluster A 192.168.0.100

$ORIGIN scea.com.

In the preceding example, 192.168.0.100 is used as the IP address of the DNS/web server you are setting up. Replace each occurrence of that IP address with the IP address of the machine you installed the DNS server on.

Where this file must be placed on your computer depends on the DNS server you installed. If you're using BIND, the file should be placed in either /etc/namedb or /var/named, depending on how it was installed. If you're using TreeWalk DNS, place the file in C:\Windows\System32\dns\etc. If you installed another DNS server, consult the documentation that came with the software to see where DNS Zone files must be stored.

All that's left to do now is to make your DNS server aware of the new DNS Zone you have just created. To do this, locate the named.conf file on your computer. If using BIND, this file may be found at /etc/named.conf. For those using TreeWalk DNS, the file is located at C:\Windows\System32\dns\etc\named.conf. Again, consult the server documentation if you are using another DNS server.

Once you've located the file, simply append this entry to the end and save the file:

zone "scea.com" {
type master;
file "scea.zone";
};

All that is left to do is restart the DNS server so it takes note of the new DNS Zone. If you're using BIND, run the named executable.

This will need to be done via a shell prompt, and most likely will require root privileges. To run the executable with root privileges, type the command sudo named. You will then be prompted for the root password to your machine.

If you're using TreeWalk DNS, access the TreeWalk control panel via the Start menu and click "Reload" and then "Start" if the server isn't already running.

That's all for the DNS server; now it's time to set up the web server.