
| File Type | zip |
|---|---|
| Filesize | 301.98 KB |
Friday, August 22, 2008


Monday, August 11, 2008
Modify the Color of the PSP Activity LEDs
Ever wish that the Memory Stick Duo Activity LED and the WiFi Activity LED on your PSP were pink and chartreuse? Well, these colors might be a bit of a stretch, but this hack will show you how to change the default LEDs to colors of your choice.
There is no doubt that the gaming world has come a long way from producing gaming systems that look very boxlike to a new age of sleek and stylish systems like the PSP. But no matter what, each new system rolls off a production line of unoriginality. As consumers, we love to add our own style. So here is a tutorial that describes the process to replace the original Memory Stick Duo Activity LED and the WiFi Activity LED with different LED colors of your choice. This is pretty simple to do; however, I don't suggest you try this at all (unless you are sure you can do it), since the cost of the PSP and the size of the components you'll be working with both lie at their respective extremes. This will void your warranty and other fun stuff like that.
Seriously, if you are a novice at such things, do not try this. Get your soldering iron guru friend to help out.
Now, with the "Don't try this" warning out of the way, let's move on to making the PSP more personally aesthetically pleasing.
Things You Will Need
- Sony PSP (any firmware version)
- Memory Stick Duo (required for testing)
- Small Phillips head screwdriver
- Soldering iron, 15 watt or less (a fine tip helps)
- Surface Mount LED (type 0603 of your choice of color; find them at http://www.lsdiodes.com/smd)
- Multimeter (for testing polarity on the LEDs)
- Miscellaneous utilities (Xacto knife or razor knife, solder braid)
- Soft cloth (optional)
How to View the New Backgrounds?
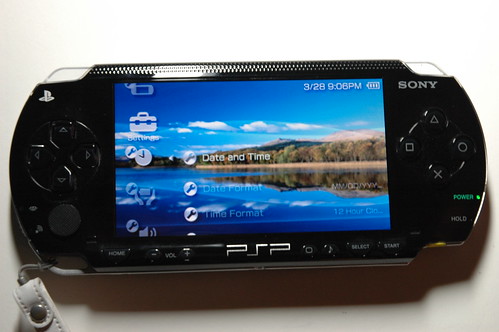
The background of the current month should already appear changed when you return to the PSP's main menu. If it doesn't, or if you want to test to make sure that all of your images work, navigate over to Settings Date & Time Settings and hit the X button. Select Date and Time from the list and hit the X button again. Change the month and hit the X button.
If the screen turns bright white, don't panic. The PSP is only allotted so much memory for displaying the background images, so if the image that is currently loaded is a little larger than normal, and the new image that you are trying to load is also a little too large, the PSP won't be able to handle both images simultaneously, and the bright white screen can be the result of its failure to load the image. This shouldn't happen when the date normally changes between monthsonly when you force a change using this method.
Hit the X button again to bring the month back up, and hit the X button a third time to confirm without changing the date. If the picture is properly formatted, it should load now, since it no longer has to compete with another image for that memory space. If it doesn't load, make a note of which image it was so that you can replace it with another image the next time you run PSPersonalize.
Keep switching the date month by month, to make sure all the background images you created or downloaded off the Internet properly load. If they don't load, simply set up some new images and run PSPersonalize again. Keep doing this until you have all of the different months on the PSP loaded with your favorite background pictures. Enjoy!
Using PSPersonalize
On the PSP, navigate to Game Memory Stick and hit the X button. You will see PSPersonalize and a file called Corrupt Data next to it. Ignore the Corrupt Data file, select PSPersonalize, pause for a moment to notice the cool background and audio for PSPersonalize, and then hit the X button.
The same PSP animated screen that plays whenever you run a game will be displayed. After this graphic is displayed, a black screen with white and yellow text will appear:
copy
ms0:/01.bmp
to
flash0:/vsh/resource/01.bmp
are you sure?
O= OK, X = Cancel
The first location, ms0:/, is the root directory of your Memory Stick, and the second location, flash0:/vsh/resource/, is the folder where the background images are stored on the internal flash memory of your PSP. Hit the O button to replace January's graphic with the picture you have named 01.BMP and placed in the root directory of your Memory Stick.
After you hit the O button, "please wait…" will appear momentarily in the upper-left corner of the screen while the file is copied over, and then you will be returned to the previous screen, only now it will read 02.bmp as the file is being copied over. Continue hitting O at each screen until you have replaced all 12 files. Once this is done, a small note will appear in the upper-right corner of the screen, reading "finished…". Hit the Home button on your PSP. A prompt will come up asking "Are you sure you want to quit the game?" Select Yes and hit the X button. You will be returned to the main menu of your PSP.
Now all the new images should be copied over to your PSP's internal flash memory, so the next time you mount your Memory Stick on your computer, you can feel free to delete all the .BMP files that you placed there for the transfer.
Remember, if you want the same background year-round, simply make 12 copies of the same file and name them 01.BMP through 12.BMP. Likewise, if you want the background graphic to change only in July, make just one file, 07.BMP, and hit X each time you are prompted by PSPersonalize to copy the file until it asks whether you want to copy ms0:/07.bmp. Now that you know how to use PSPersonalize, you can replace the images of individual months whenever you like.
Sunday, August 3, 2008
Angry PSP Theme

For PSP with firmware 3.71 M33+ and with 3.80 M33+
Please put the PTF file into X:/PSP/THEME/ directory.
Then choose the theme in Settings > Theme Settings.
Download here
Blue Robot PSP Theme

It works with PSP firmware 3.71 M33+ and with 3.80 M33+
Copy the PTF theme file to your X:/PSP/THEME/ directory.
Choose the theme in Settings > Theme Settings.
Download here
Yellow Robot PSP Theme

This theme works with firmware 3.71 M33+ and with 3.80 M33+
Copy the PTF file to your X:/PSP/THEME/ directory. Choose the theme in Settings > Theme Settings.
Download here
Subscribe to:
Comments (Atom)
