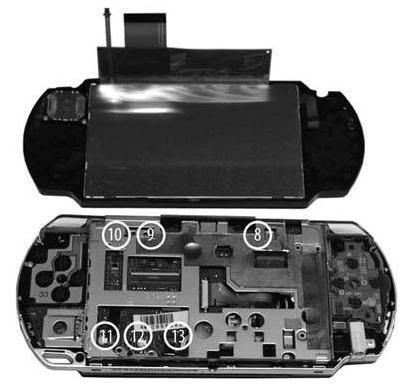
The most important part of this stage is that you carefully record where each screw goes. Since most of the screws are different sizes, it would be easy to mix them up. Picture below illustrates where each of the screws is located.
Be careful not to strip the screws. It is better to apply pressure to ensure the screwdriver head does not slip than it is to strip the screw.
Here's how to remove the LCD tray:
-
Remove the silver screw (8) from top right of tray.
-
Remove the two silver screws (9 & 10) from the top left of the tray.
-
Remove the two silver screws (11 & 13) and one black screw (12) from the lower left of the tray.
-
Eject the UMD disk tray.
-
Lift the tray from the bottom of the PSP and slowly wiggle it loose from the UMD catch at the top of the PSP.


No comments:
Post a Comment