You are nearly there. The trickiest part of this step is to be sure that the LCD backlight power strip (the small one) is properly seated. You will note two small extensions on the sides of the strip near the end. These will come in handy when you attempt to seat the connector. Figures below highlight the areas you will be working with when reinstalling the LCD.
To reinstall the LCD:
To reinstall the LCD:
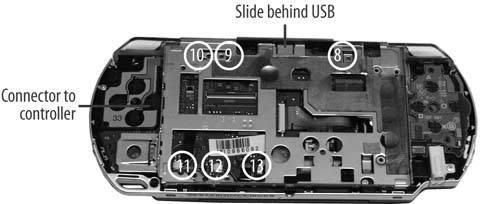
- Lay the LCD tray into place. Do this slowly and carefully, since the wrong position can cause problems. The top of the tray should slip behind the USB connector. The bottom of the tray has a screw mount that slides under/behind the black PSP shell. Finally, the left side of the tray merges with the left controller. Once it is in place, shut the UMD tray. If it clicks smoothly shut, the tray is probably installed correctly.
- Insert and tighten screws 8, 9, 10, 11, 12, and 13.
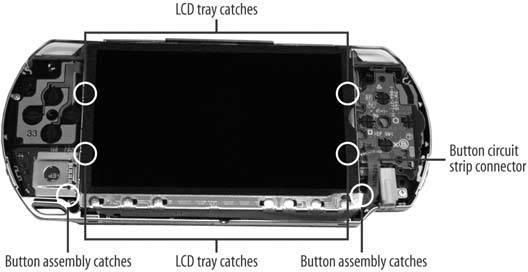
- Flip the LCD over on its back, slide the large and small circuit ribbons into their respective slots, and close the catch. Start with the large ribbon first, and then do the small ribbon. Use the little wings on the small ribbon to guide it into the catch.
- Flip the LCD over and carefully insert it into the tray. Start with the right side, and then apply light but firm pressure on the left side to click the LCD into place.

No comments:
Post a Comment