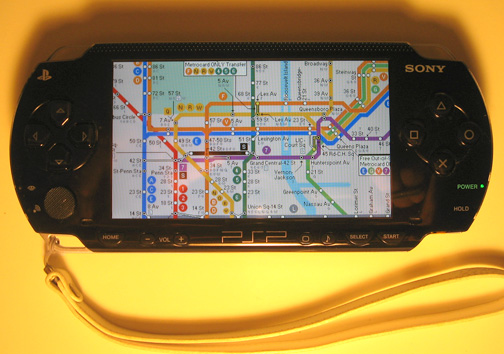
The browser included with the Version 2.0 firmware is capable of opening plain text and HTML files saved locally on your Memory Stick. You could easily export your address book as HTML, name it something handy like addressbook.html, place it in the root directory of your PSP, and navigate to it in the browser by entering file:/addressbook.html in the address bar. This would make a nice enhancement to the Memory Stick portal hack. While you're generating a portal for your PSP's Memory Stick, why not convert your address book to HTML?
Wednesday, March 26, 2008
Address book through the Web.
The browser included with the Version 2.0 firmware is capable of opening plain text and HTML files saved locally on your Memory Stick. You could easily export your address book as HTML, name it something handy like addressbook.html, place it in the root directory of your PSP, and navigate to it in the browser by entering file:/addressbook.html in the address bar. This would make a nice enhancement to the Memory Stick portal hack. While you're generating a portal for your PSP's Memory Stick, why not convert your address book to HTML?
Turn addresses into pictures.
The little black bookan address book, keeping track of the names, phone numbers, and sometimes addresses of important contactshas been one of the most popular non-digital assistants, surrounded by its own social mythology. And it has become the must-have feature of even the most simplistic PDAs. We have address books on our computers, our cell phones, and our iPods, and ideally we like to keep this information synchronized between these different devices. Why not sync this data to your very sleek PSP?
Before Sony released their browser with Version 2.0 of the firmware, and before people figured out that they could redirect the Wipeout Pure browser to view the rest of the Internet, several people realized that you could keep a lot of information on your PSP using the device's built-in picture viewing capabilities. You can easily convert your address book to a series of images that you can view on your PSP. Just export your contacts in some sort of textual form, convert to PDF, and then convert the PDF to a series of JPEG images.
This can be time-consuming. Fortunately, if you are using a Macintosh computer running OS X, PocketMac for PSP (http://www.pocketmac.net/products/pmpsp/index.html; $9.95 USD), shown in Figure 3-54, synchronizes the contacts in your address book or Entourage address book to an images folder on your PSP. Each contact appears in a separate image, and you can scroll through the names on the PSP and hit the X button next to any name whose details you need to view.
PocketMac for PSP can also sync pictures and music from iPhoto and iTunes to your PSP.
Turn Your PSP into a PDA
With the web capabilities in Version 2.0 of the firmware and all the homebrew options available to people running Version 1.5 of the firmware, you could easily do many of the tasks you would normally do on your PDA on your PSP.
If your boss has agreed to bankroll a new PDA to help you keep track of your busy schedule, you're probably not going to be able to convince him that the PSP is the PDA you need…at least not yet. Many of the rumors and quotes in the media indicate that Sony wants to grow the PlayStation Portable to be the must-have digital device. They have already released Version 2.0 of the firmware that added a browser and opened the platform up to more functionality than it originally had, so there is every chance that future firmware updates will add even more functionality.
Nevertheless, there are several current options, both homebrew and non-homebrew, available for the PSP that can make it a rather attractive make-shift PDA. The text-entry capabilities of the device are currently limited by the lack of a functional keyboard attachment for the PSP, but hopefully either Sony or a third party will fill this need soon. In the meantime, this hack will walk you through the different ways you can trick out your PSP as a PDA.
Saturday, March 22, 2008
Offline View with MapQuest or Google Maps
You must then convert the PDF you have printed into JPEG files for viewing through the PSP's photo-viewing capabilities. Alongside this printout, you can save the individual image files from the web site and place all these files in the same folder inside /PSP/PHOTO/ on your Memory Stick.
Now, a really cool tips would be to somehow code a homebrew app that worked together with a hacked GPS receiver to track your whereabouts with your PSP. An intrepid hacker has made quite a bit of progress on just such a hack (see http://pspupdates.qj.net2005/11/gpsp-gps-front-end-program-for-psp.html).
In the meantime, however, you can email the files you've created to your friends via the webmail discussed earlier in this hack, or even upload the images to Flickr (http://www.flickr.com). Have fun!
How to use your PSP as a makeshift atlas?
I've divided this hack into sections that cover online or offline map viewing, so feel free to jump ahead to the section that you're interested in.
Because neither Google Local (formerly known as Google Maps) nor MapQuest currently work in the Wipeout Pure browser, the online section is a Version 2.0 only hack. If you're following the offline section of this hack, there will be virtually no differences between PSPs running different versions of the firmware.
If you're not sure which version of the firmware you are running, navigate to Settings System Settings, hit the X button, select System Information, and hit the X button again.
If your PSP is running an earlier version of the firmware, you should skip ahead to the next section, since neither MapQuest nor Google Maps currently loads in the Wipeout Pure browser.
As of the writing of this hack, Google Maps is still in beta, and doesn't currently work with either the PSP browser or the Wipeout Pure browser. The placeholder page that says that these browsers are not compatible with Google Maps, however, loads nicely and easily in both browsers, so there is a chance this will change soon. If PSP compatibility should happen, the basics that I am covering here with MapQuest can be easily translated over to Google Maps.
Launch your PSP browser and go to MapQuest's main page (http://mapquest.com). Once the page loads, scroll down to the address entry fields and enter an address.
Once the map page loads, you can zoom in or out as you need, using the default MapQuest functions. Once you have the correct map loaded, place the pointer over the image and hit the Triangle button to bring up the PSP browser interface. Use the directional keypad to highlight the File icon (the one in the bottom-left corner of the screen), hit the X button, select Save Image from the menu that appears, and hit the X button again.
Make sure that the Destination is set to /PSP/PHOTO/ (you may also want to rename the file's name to something manageable under the File Name field). To change either of these values, use the directional keypad to select the field you need to change and hit the X button. Make your changes, and then hit the X button again. Once you are done, select Save and hit the X button. A progress bar will appear to let you know how much of the file has downloaded. Once the download is complete, the screen will read "Save completed." Hit the O button to return to the PSP browser.
The image you downloaded is now available for viewing on your PSP. Leave the PSP browser and navigate to Photo. Scroll down the list of photos until you find the image you have just downloaded. Select the image and load it on your PSP's screen. Then you can hold down the Square button and use the analog stick to zoom in on the map, and then release the Square button and continue using the analog stick to pan and scan around the map.
If you need directions, use MapQuest's features to get the full directions on the screen, and use the instructions I just covered to grab each of the pictures involved (there is a Map link next to each numbered step) in the directions. Save each file in sequence: leg01,gif, leg02.gif, leg03.gif, etc. This way, you can easily track each leg of the trip while you are on the move. Alternately, select Print for what would be the version of the page that you would print out, were you on a computer. There will be two images of your trip listed: one overview of the entire trip and a detail of the last section. Save both of these images.
You need to grab the text of the directions for viewing while you are on the go and away from a WiFi signal, the best way to do this is to use MapQuest's email feature to email a copy of the directions to a web-accessible email address. Click on the email link and enter TO: and FROM: email addresses (both of which are required). You will be taken to a confirmation page once you are done.
Once your email has been sent, navigate to your web-based email account, log in, and place the cursor over the link that would open the email in a new window. Hit the Triangle button, navigate to the File menu, hit the X button, select Save Link Target, and hit the X button. Rename the file to something such as "directions" and save it to /PSP/COMMON/.
Now when you are out and about, you can launch the PSP browser and type file:/psp/common/directions in the address bar to bring up the text directions you saved. Bookmark this file for easy launch, and you can continually replace it when you need new directions to new places.
Read offline RSS ver. 1.xx in PSP
Your other option, assuming you are running Version 1.00 or 1.50 of the firmware, and not 1.51 or 1.52, is to keep an eye on the homebrew scene. There are several homebrew projects that already allow you to navigate the file structure of your Memory Stick, and I've heard of a few homebrew web browsers and text-viewing projects that are in the works. If you find a good homebrew solution for viewing the files, you can use the methods discussed in the Version 2.0 section to prepare the files for viewing on your PSP.
Tuesday, March 18, 2008
Read online RSS ver. 1.xx in PSP
Once you have everything up and running and you are connected to one of the public portals such as the fujimax PSP Web Portal (http://67.171.70.72/wipeout/index.html) or a portal that you have put together yourself, enter the address for Bloglines Mobile (http://bloglines.com/mobile/) in the address bar and hit Enter. Select Go and hit the X button. The Bloglines Mobile site will load, albeit much slower than it does in the Version 2.0 browser. Select the text field next to Email and enter the email address with which you set up your Bloglines account, and then enter the appropriate password, select the Enter button, and hit the X button on your PSP. The page will load and you will be able to read through your different RSS feeds.
Unfortunately, the Wipeout Pure browser doesn't support cookies or bookmarks, so each time you want to check your RSS feeds online, you are going to have to repeat all of these text entry steps. Also, there is no tabbed browsing with this browser, so if you click out of Bloglines, you have to go all the way back through these steps to get back in.
Read offline RSS 2.0 or later in PSP
A much easier option, which will also take up a lot less space on your Memory Stick than all those images would, would be to access your Bloglines account from your computer's web browser. After you have logged into your account, click each group or one overall group of your feeds to display all the posts on one page. Once the page fully loads, right-click in the side panel where all those stories appear. A contextual menu should pop up, giving you an option similar to either Save or Save As…. The wording of this will vary depending upon your system.
I choose Save Frame As… and saved the page as source. You will need to save either as source, HTML, or a .txt file, depending upon the options you are offered. If you can save the file directly to text, do so; if not, you will then have to take another step to convert it to text. Take the file and open it up in your computer's web browser; it will appear with all the text intact, although some of the formatting will most likely be off a bit. Choose Edit Select All, and then select Edit Copy. Open up your text editor of choice, select Edit Paste, and save the file as a plain text file. Name it feeds.txt.
Take the feeds.txt file that you have created and place it in the root directory of your PSP's Memory Stick.
Now, when you are out and about without an open WiFi access point, you can view this feeds file by launching your web browser (if you have a home page configured, you may need to have the WLAN switch turned on for it to launch, and you'll need to cancel out of any attempts to conntect to an access point), hitting the Triangle button, entering file:/feeds.txt into the address bar of the PSP's browser, and hitting Enter to launch the file within the browser. It's not a pretty feed-reading solution, but it is very functional.
You could do the same thing with a local HTML file that you saved to the root directory of your PSP, but since Bloglines loads images along with its feeds, if you don't strip the HTML from the page by taking the extra step of resaving it as plain text, the PSP Browser won't properly load the page because it will keep attempting to connect to the access point to grab the images pointed to in the HTML.
However, some browsers give you the option to save the images along with the HTML file. For example, Firefox creates a directory that holds these if you choose the "Web Page, complete" option when you save the page (if your web page is named myblogs.html, you'll need to copy the myblogs_files subdirectory over to your PSP, along with myblogs.html).
Now, just like with the Bloglines Mobile page, make sure you make a bookmark to this feeds.txt file. You could even set this page as your home page in the PSP browser, so that every time you launch the PSP Browser, it will go directly to this file. With a little work, it won't be that difficult to set up a regular system through which you can update this file with the latest feeds before heading out the door.
Read online RSS 2.0 or later in PSP
Make sure that you have your WLAN switch on, are in range of a WiFi Internet connection, and that you have properly set up such a connection.
Once the browser launches and your PSP connects to the Internet, hit the Triangle button to bring up the Browser's address bar. Navigate to the address bar using the directional keypad and hit the X button. This will bring up the PSP's text entry control panel. Type in the address for Bloglines Mobile (http://www.bloglines.com/mobile/) and hit Enter. The Bloglines Mobile page will load.
Hit the Triangle button to leave the browser's control screen and view the web page full-screen. Select the text field next to Email and enter the email address with which you set up your Bloglines account, then enter the appropriate password, select the Enter button, and hit the X button on your PSP. Fortunately, the PSP handles cookies nicely, so the next time you visit Bloglines, your PSP will remember your account information, and you will not have to redo all of this typing. This will take you to a simplified, mobile-ready version of your Bloglines feed page, where you can read through all the feeds you have added to your Bloglines account.
I suggest that you bookmark this page. Hit the Triangle button to bring up the browser's interface, select the heart-shaped icon, which is the Bookmarks control panel, and hit the X button. Choose My Bookmarks, hit the X button again, highlight "Add to Bookmarks," and hit the X button again.
Simply navigate up and down the page, hitting X whenever you want to select a bit you want to read. If you want to visit the page of one of the posts you are reading in Bloglines, but do not want to leave the Bloglines page you are viewing, simply select the link, and press and hold the X button. This will launch the link in one of the browser's three tabs. After you have read the post and want to return to the Bloglines page, simply hold down on the Square button and hit the L trigger to switch back to the first tab.
If you want, you can always navigate over to the normal Bloglines site by clicking the Full Bloglines link on the Bloglines Mobile page. The PSP is perfectly capable of running the full version of Bloglines, but the right column of the layout tends to get oddly squished in the PSP browser. The mobile version, however, will be quicker and will run a lower risk of returning an out-of-memory error after you've been surfing for a while.
Thursday, March 13, 2008
Reading RSS Feeds on Your PSP
Although Sony has hinted at expanding RSS Channel (included with Version 2.6 of the firmware) to be something more than a podcast-streaming feature of the PSP in the future, currently there is no Sony-supported solution for reading your RSS feeds on your PSP. This hack will walk you through several different ways to read your RSS feeds on your PSP. If you're running a PSP with Version 2.0 or newer firmware, then you can use the included browser. If you've managed to get your hands on a PSP running Version 1.0 or 1.5 of the firmware, and you've neglected updating so that you can keep running all the homebrew games and applications out there , then you can either use the Wipeout Pure browser hack to view your RSS feeds or you can convert your feeds to JPEG files for reading on the go.
I've divided this hack into sections that cover each possible firmware configuration, so feel free to jump ahead to the section that corresponds to your PSP's firmware.
If you're not sure which version of the firmware you are running, navigate to Settings System Settings, hit the X button, select System Information, and hit the X button again. An informational screen will appear on your PSP, listing your PSP's MAC address, the System Software version (this is the firmware), and the nickname of your PSP.
How to Transfer Podcasts to Your PSP?
The first step is to locate where iTunes is keeping your Music Library. If you're using a Mac, launch iTunes and click iTunes Preferences. Then click the gear icon labeled Advanced. If you're using Windows, launch iTunes and select Edit Preferences, then click the Advanced tab. The first item on this page of the dialog box labeled "iTunes Music Folder Location" is where you will find your music files. On a Mac, the default location is ~/Music/iTunes Music/ (in your home folder). In Windows, the default is C:\Documents and Settings\username\My Documents\My Music\iTunes\iTunes Music\.
Browse to the folder where your music library is located. You should see a list of folders corresponding with the names of artists in your Music Library, as well as a folder labeled Podcasts. Open this folder and the folder named after the podcast(s) you have just downloaded. In this folder should be the podcast's episode itself, named similarly to what appears in iTunes.
To transfer the podcasts [Hack #23] to your PSP, plug in your PSP to a USB port and from the PSP home screen, select Settings, then USB Connection. On a Mac, a new volume will appear on your desktop. In Windows, a new drive will be mapped under My Computer. Double-click on the volume or drive and then open the PSP folder. Inside, you should see some media folders; open the MUSIC folder.
All you need to do now is to copy the podcasts to your PSP. Simply drag and drop the podcast's episode from the folder in your music library to the MUSIC folder on your PSP. Before unplugging your PSP, make sure to eject it first. On a Mac, drag the volume on your desktop to the trash can in the dock. In Windows, right-click on the drive and select Disconnect.
Exit USB Mode on your PSP and navigate to the Music icon. Then highlight and press X on the Memory Stick icon. You should now see the podcast episode you just transferred to your PSP.
You may want to create a folder inside the MUSIC folder called "Podcasts" and instead transfer podcasts there. This will not only keep Podcasts separate from the rest of your music, but it will also allow quick access for transferring new podcasts and deleting old ones.
How to download podcast?
What you should now see before you are a number of different podcasts that you may download. Pick a podcast you find interesting by clicking on it. You will then be presented with a list of available "episodes" for that particular podcast. In the Price column (most, if not all, of them are free) to the right, you will see a button labeled Get Episode. Click this button and the episode will be downloaded to your music library.
There are some podcasts that will not play on the PSP. Podcasts that fall into this category are enhanced podcasts and podcasts that are purchased and contain digital rights management. If you find that a podcast you really want to listen to will not play on your PSP, try burning the podcast to an audio CD from iTunes. Then, rip the podcast to your music library as an MP3, using iTunes' CD-ripping features.
Sunday, March 9, 2008
Listen to Podcasts that you've subscribed to, using Apple's iTunes.
Podcasting, in its simplest form, is a way of broadcasting online that combines prerecorded audio files with some kind of syndication technologyusually RSS 2.0. What this means for listeners is that they can subscribe to a podcast and automatically be notified when new episodes of the podcast are released. Programs that automate the process (podcatchers) have made obtaining and listening to podcasts extremely easy. Because of this, podcasting has taken off as one of the premier forms of online broadcasting.
If you've upgraded
There are many programs you can use to obtain podcasts. The most popular podcast-specific program (known as
This section, however, will use iTunes, because it's slightly more convenient than Juice Receiver. You can both download and listen to podcasts from within iTunes. Furthermore, the Podcasts section of the iTunes Music Store features a large and easy to navigate podcasting directory. However, you can adapt the instructions in this section to your podcatcher of choice.
The Code for Portal Creation
Unix, Mac OS X, Linux
cp make_index.pl /Volumes/Untitled
Windows
xcopy make_index.pl F:\
If your Memory Stick has a name other than Untitled, Mac OS X users should use the appropriate directory name. If you are on Windows, choose the drive letter (F:, in these examples) that your PSP was assigned. If you are on Linux, be sure to replace /Volumes/Untitled with the mount point of your PSP.
To run the script, you must run the following command from the command line.
In Mac OS X, use the Terminal (located in /Applications/Utilities/) and run the following commands:
cd /Volumes/Untitled
perl make_index.pl
These are the same commands you will use in UNIX/Linux.
In Windows, open a command prompt and run:
F:
cd \
perl make_index.pl
Once the script begins running, you will be prompted for your del.icio.us username. If you enter nothing, this step will be skipped. After the command has completed running, you can navigate to the root level of your Memory Stick and you will see a newly created index.html file. Double-click on this file to launch it in your computer's web browser and inspect the results of the code.
Once you have this script created, you can run it every time your PSP is connected to your computer to update the index.html file.
On your PSP, make sure that you bookmark file:/index.html in the browser, so that you can easily navigate to this index of all of your photos, text files stored in the Notes folder, and your del.icio.us bookmarks tagged with PSP. Consider making it your home page.
Installing Dependencies for Portal Creation
Windows
If you are on Windows, first make sure you have Perl installed (we suggest ActivePerl, which you can get from http://www.activestate.com). Next, grab PerlMagick, which is part of the ImageMagick package available under the Windows Binary Release section of the ImageMagick site (http://www.imagemagick.org/script/binary-releases.php). Next, install cURL from http://curl.haxx.se/download.html and put the executable in your PATH. C:\Windows will work, but we suggest you add an entry to your PATH and put it there. If you choose the version of cURL with SSL support, you may need to install additional libraries. This script does not require SSL support.
Mac OS X
If you are on Mac OS X, you need to install ImageMagick. Download the source of ImageMagick (http://www.imagemagick.org/script/install-source.php). Extract the source, and then from the Terminal (which is located in /Applications/Utilities/), type the following commands:
cd ImageMagick-
./configure && make
sudo make install
Each line is a separate command. Enter the first command, then hit return and wait while a bunch of text flies by in the Terminal window. This will build ImageMagick from the source. If the string of text comes up with any errors at the end after the second command, then try running the command again with sudo at the beginning. After the third command, when sudo is invoked you will be asked for a password (and possibly a warning, if this is the first time you invoke sudo). Enter the Administrator password for your computer.
After ImageMagick successfully compiles, you may need to compile Perl-Magick, if it was not compiled automatically. Enter the following commands to build PerlMagick (the PerlMagick directory is a subdirectory of the ImageMagick-
perl Makefile.PL
sudo make install
Again, if there are any errors in step two, try invoking sudo at the beginning of the command.
Make sure you check the installation documentation that accompanies ImageMagick (in particular, the README and INSTALL files), since you may need some other programs that ImageMagick depends on. For example, on Mac OS X, we needed to install libjpeg (see http://www.ijg.org/) from the source tarball (jpegsrc.v6b.tar.gz), using the following commands:
tar xvfz jpegsrc.v6b.tar.gz
cd jpeg-6b/
./configure && make
sudo make install
sudo make install-lib
sudo ranlib /usr/local/lib/libjpeg.a
UNIX/Linux
Make sure that you have PerlMagick installed. This should be available in your Linux distributions package repository. If not, you can follow the Mac OS X instructions to compile it from source. You will also need cURL.
Tuesday, March 4, 2008
Creating a Portal for Your Memory Stick Files
Well, you have a PSP with Version 2.0 or later of the firmware, so you don't have all the great homebrew emulators available for the earlier versions. However, unless you downgrade from Version 2.0, you are making do by loading every JavaScript-capable game or program you can find onto your Memory Stick and converting all your documents to text files for viewing via the nifty little browser that Sony included with Version 2.0 of the firmware.
Let's really trick out your PSP by putting together a Perl script that will run on Windows, Mac OS X, or Linux, with only a few dependencies. This script will automatically scrape the photos contained in your Memory Stick's /PSP/PHOTO/ folder, scrape any text files contained in /PSP/NOTES/, optionally grab any links on your del.icio.us (http://del.icio.us) account that are tagged with "psp," and build an index.html file linking to all these files and located at the root directory of your Memory Stick.
How to assemble ebook for your PSP?
Highlight your e-book and press the X button to load the first page. If you hit the Triangle button to bring up the control panel, you can select the first option on the top row, View Mode, to set the page to be zoomed in, so that you can easily go through all the pages of your book by clicking the R trigger without having to continually rezoom. To scan up and down the page, use the analog stick. Most pages will load centered, so you will need to scan up to the top of the page and then scan down as you read. If you need to zoom in on a section of the text, hold down on the square button and move the analog stick up and down to zoom in and out.
The great thing about this tips is that every document that is printable from your computer can be converted into JPEGs for viewing on your PSP on the go.
How to Convert PDF to JPEGs?
Adobe Acrobat.
Most likely, you already have a copy of Adobe Reader or Adobe Acrobat Reader on your computer. They are actually both the same program, only Adobe has recently renamed Acrobat Reader as Adobe Reader. If you don't have either on your computer, you can grab a copy for free directly from Adobe (http://www.adobe.com). This program will allow you to view the PDF you have created, but unfortunately it does not support exporting the page images into different formats.
If you own the full version of Adobe Acrobat, you can export the PDF file as a series of JPEGs, and Acrobat will even do the work of naming each separate page as another image in sequence (Image001.jpg, Image002.jpg, etc.).
Preview.app
If you are on Mac OS X, you can use Preview (included with the operating system and located in the Applications folder). If you open the PDF for your e-book in Preview, you can use File Save As to manually save each page as a separate JPEG file. For a large document, this can be laborious to say the least, so it is not the ideal solution.
Image-editing programs
Using an image-editing program such as Adobe Photoshop or Photoshop Elements, you can open a selected page of the PDF and resave it as a JPEG with high quality compression. On Mac OS X, Graphic Converter (available from http://www.lemkesoft.com/en/graphcon.htm for $30 USD) can do the same. You might already have some sort of image-editing program that came with a digital camera or scanner and is capable of opening PDFs and converting them to JPEGs. The GNU Image Manipulation Program, GIMP (http://www.gimp.org/), is available for Windows, Linux, Unix, and Mac OS X, and can handle a wide variety of formats, including PDF and JPEG.
PDF 2 PSP
If you are using a Mac, then you can grab a helpful, free little program called PDF 2 PSP (http://pdf2psp.sourceforge.net/).
In PDF 2 PSP, you choose the location of the PDF and then a folder where you want the collection of sequenced JPEGs to be stored. If your PSP is connected and mounted on your computer, you can even have the program output directly to /PSP/PHOTO/ on your Memory Stick. You have the option to either adjust the picture to be displayed in portrait or landscape view on the PSP, you can set the quality of the image, and you can set the size of the pages to a variety of options: Original Size, Fit to Screen, Fit to Width, 2x Screen Width, and High Resolution. I recommend choosing Original Size, 2x Screen Width, or High Resolution to ensure legibility of your document on the PSP, and setting the layout to portrait to allow you the ability to both zoom in on the image and pan and scan around the page.
iPSP
iPSP (http://ipsp.kaisakura.com/; $19.99 USD) features the ability to convert PDFs to JPEGs formatted to fit on your PSP, but there aren't as many configuration options available as there are with PDF 2 PSP. This isn't necessarily a bad thing, however, as iPSP does a good job of converting PDFs to JPEGs. There are both Mac and PC versions of the program, but at this time, it looks like only the Mac version supports PDF to JPEG conversion. As an example for this hack, I took a PDF copy of the PSP's manual from the PlayStation site (http://www.playstation.com/manual/pdf/PSP-1001K_1.pdf) and converted it into a folder of sequenced JPEGs for reading on the PSP.
With iPSP, there is no need to locate the folder of converted images and then move them to /PSP/PHOTO/ on your Memory Stick, since the program automatically places the files in the proper location as it converts.